Access Point modes
Client (on board)
If you do not want to set up an access point and just want to connect your system to the marina’s public WiFi as a client using your built-in WiFi (on board), you will use the tool provided by your system to make the connection as usual and will set AP to none. Enable activate wlan security (nft filter) so that no device connected to the same public access point can connect to your system. Click 
Edit and finally 
Save:
There is an interesting variation of this method to have an Internet connection and at the same time create a local network and be able to connect your onboard devices to OpenPlotter. Create an AP in your smartphone and connect all your devices to it, including OpenPlotter. Disable activate wlan security (nft filter) so that any device connected to the same AP can connect to OpenPlotter using the address openplotter.local to access to your system’s open resources like the Signal K server: http://openplotter.local:3000
AP (on board)
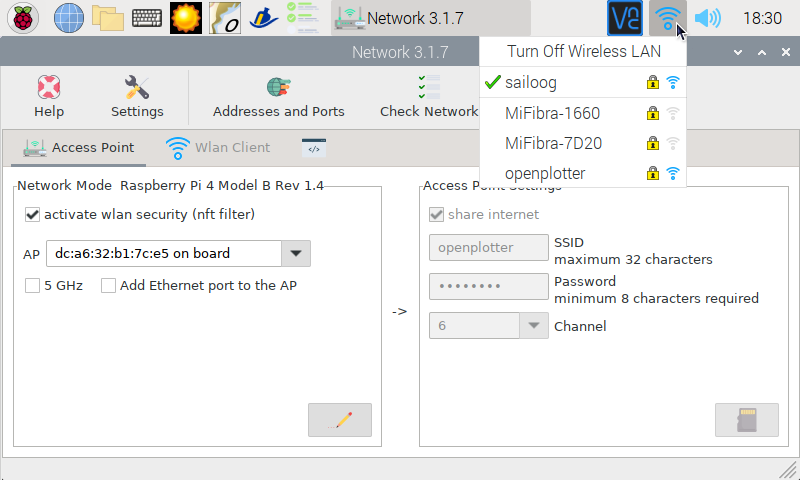
Instead of connecting to an external access point, you can use the built-in WiFi (on board) to create your own access point and connect any onboard device such as tablets, smartphones, laptops…
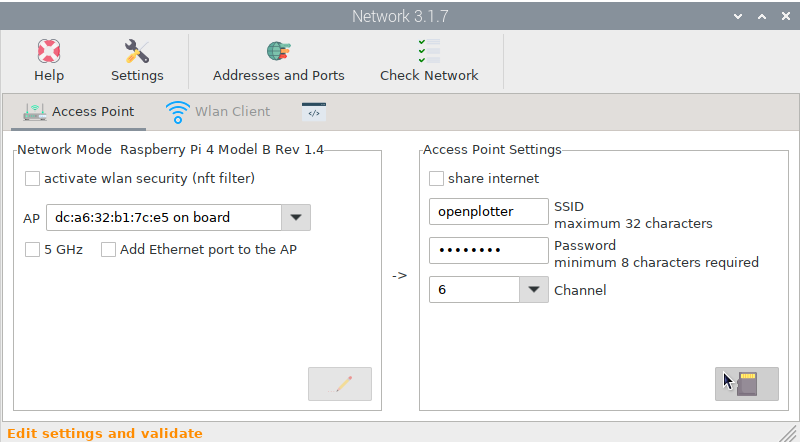
This time you do not need to enable activate wlan security (nft filter). Select on board in AP field. By default the AP works at 2.4 GHz but if the built-in WiFi device and the external devices can work at 5 GHz you can check the 5 GHz field. On your router at home, you can communicate on the same subnet with your Ethernet-connected devices and your WiFi-connected devices. If you want OpenPlotter to treat the AP and Ethernet port this way, check Add Ethernet port to the AP. Now you are ready to configure the settings of your AP, click Edit to enable the next window.
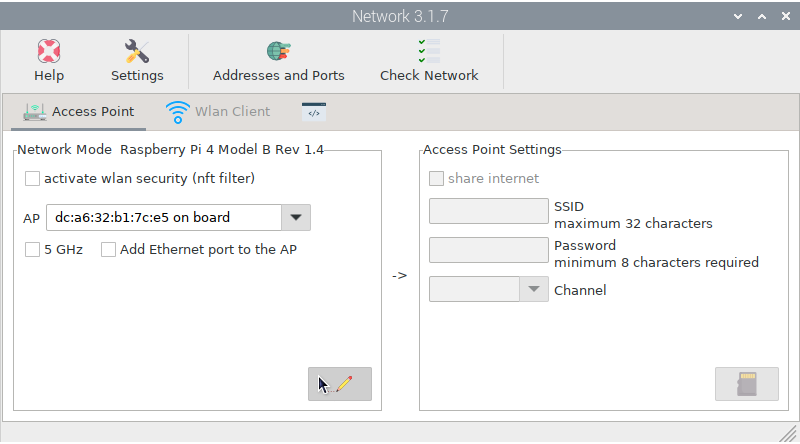
You are not connected to Internet, so uncheck the share internet field. You have to give to your AP a SSID (a name). This name will be listed when your external devices search for a WiFi AP. Give your wlan a secure Password. You can choose a channel you like. Not all selectable channels will work depending on the country setup of your system. If you are having network problems, you can sometimes solve them by changing the channel to a less crowded one. Click Save when done and OpenPlotter will reboot to apply the changes:
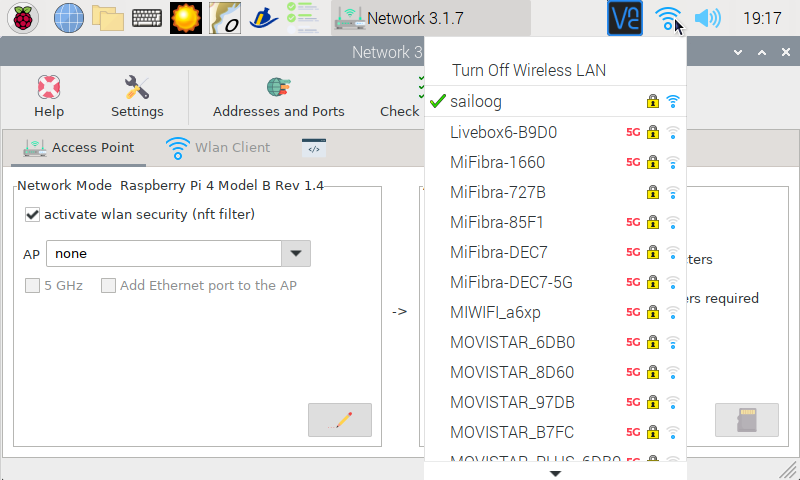
After reboot, you will see the SSID listed as an available AP by searching from your onboard WiFi devices, confirm you can connect them to your new AP. The built-in WiFi device is now busy working as an AP, so it will not be able to connect to the marina AP as you can see in the image below:
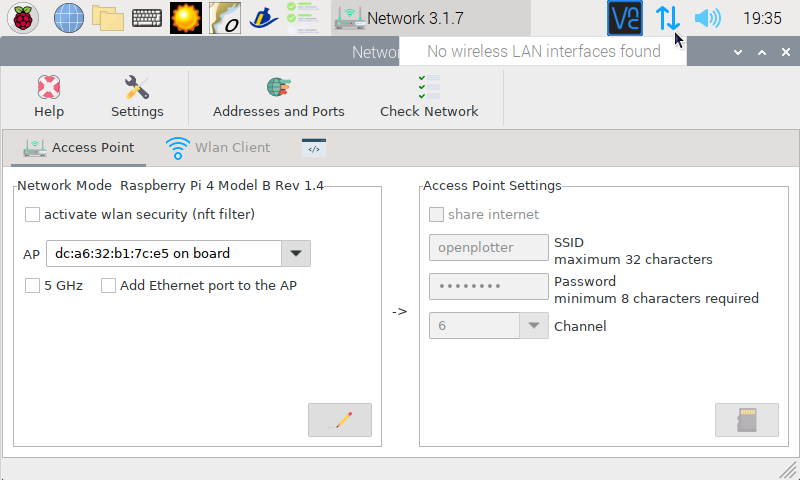
Use the address openplotter.local or the IP 10.10.10.1 to access to your system’s open resources like the Signal K server: http://openplotter.local:3000
AP + Client (on board)
Raspberry Pi models 3 and 4 can use the built-in WiFi device (on board) as an AP and a station at the same time. In this way the devices onboard can connect to OpenPlotter and OpenPlotter can connect to the marina’s public WiFi and share its internet connection with the rest of the devices. This is good for saving power, but it is less reliable and slower.
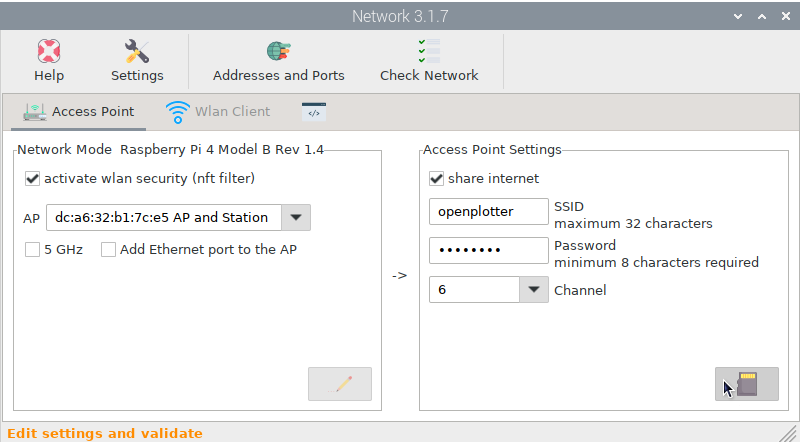
Enable activate wlan security (nft filter) so that no device connected to the same public access point can connect to your system. Select AP and Station in AP field. Check 5 GHz and Add Ethernet port to the AP if you need it and click Edit.
Check the share internet field and fill in the rest of the settings of your AP as usual. Click Save when done and OpenPlotter will reboot to apply the changes:
After reboot, you will see the SSID listed as an available AP by searching from your onboard WiFi devices, but this time you can also connect to the marina’s AP and share internet with your onboard devices:

Use the address openplotter.local or the IP 10.10.10.1 to access to your system’s open resources like the Signal K server: http://openplotter.local:3000
AP + Client (on board + usb)
This is the most reliable and effective method of creating a local network to connect all devices onboard using the built-in WiFi (on board) and also connect to the marina’s public WiFi using an external WiFi device (usb). With this method, you will be able to connect to weak WiFi signals using external WiFi devices with long range antennas.
Enable activate wlan security (nft filter) so that no device connected to the same public access point can connect to your system. Select on board in AP field. Check 5 GHz and Add Ethernet port to the AP if you need it and click Edit. Check the share internet field and fill in the rest of the settings of your AP as usual. Click Save when done and OpenPlotter will reboot to apply the changes.
After reboot, you will see the SSID listed as an available AP by searching from your onboard WiFi devices, and you can also connect to the marina’s AP and share internet with your onboard devices. Since we are using a second WiFi device, this time we will be able to see our own AP in the list:
Use the address openplotter.local or the IP 10.10.10.1 to access to your system’s open resources like the Signal K server: http://openplotter.local:3000
AP + Client (on board + tethering)
This is the most versatile method and allows you to create a local network, connect to the marina’s public WiFi, and also connect to the internet using your mobile data when the marina’s WiFi is not available.
Enable activate wlan security (nft filter). Select on board in AP field. Check 5 GHz and Add Ethernet port to the AP if you need it and click Edit. Check the share internet field and fill in the rest of the settings of your AP as usual. Click Save when done and OpenPlotter will reboot to apply the changes.
Connect your smartphone to OpenPlotter by a data+power USB cable. Enable share internet connection by USB in your smartphone (tethering). Connect your smartphone to the marina’s public WiFi or use your mobile data to provide Internet to OpenPlotter.
Use the address openplotter.local or the IP 10.10.10.1 to access to your system’s open resources like the Signal K server: http://openplotter.local:3000