Other examples
Connecting a USB-RS422 converter
You probably still have some devices onboard that use the old NMEA 0183 protocol. Most commercial plotters collect data from all onboard devices and send it through an RS422 output. To connect these devices to OpenPlotter, you need any inexpensive USB-RS422 converter.
Wiring
Typical RS422 device looks like the one below:
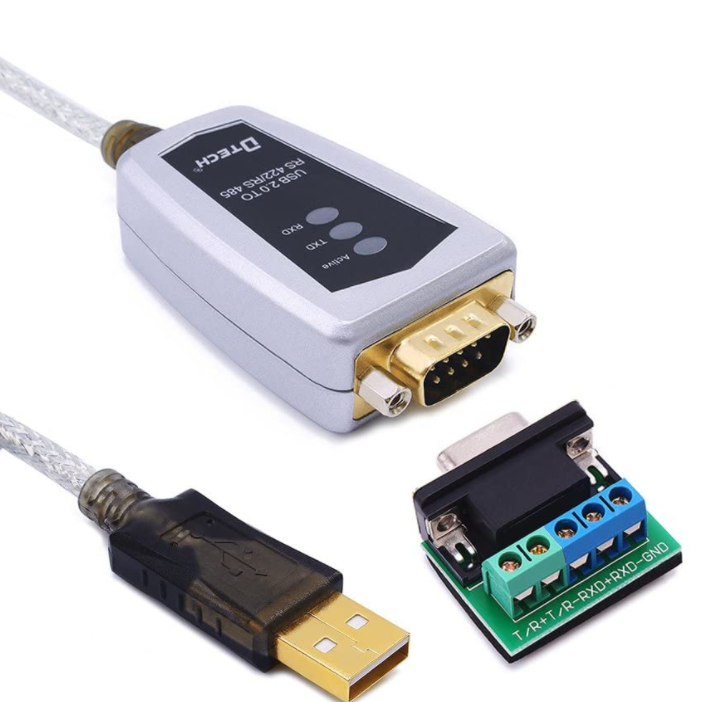
There are normally 4 or 5 connections: TX+, TX-, RX+, RX-, GND.
Important
Normally you do not need GND and you would connect TX of the chart plotter/VHF etc to the RX of the RS422 to USB device and vice versa. However, there is little consistency between different devices as to what is possitve and what is negative - so if the TX+ connected to the RX+ does not work, try connecting to the RX-.
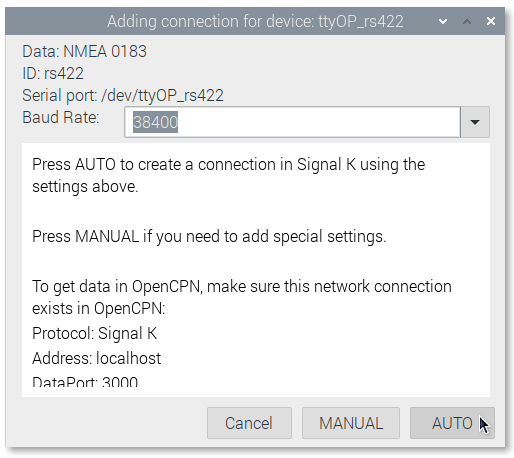
Consult your device manual to find the baud rate, if you can not find the baud rate then usually, if the device is older and pre-AIS the baud rate may be 4800, later devices that may have or accept AIS will be 38400. Use an absolute value if Auto does not work
Input data
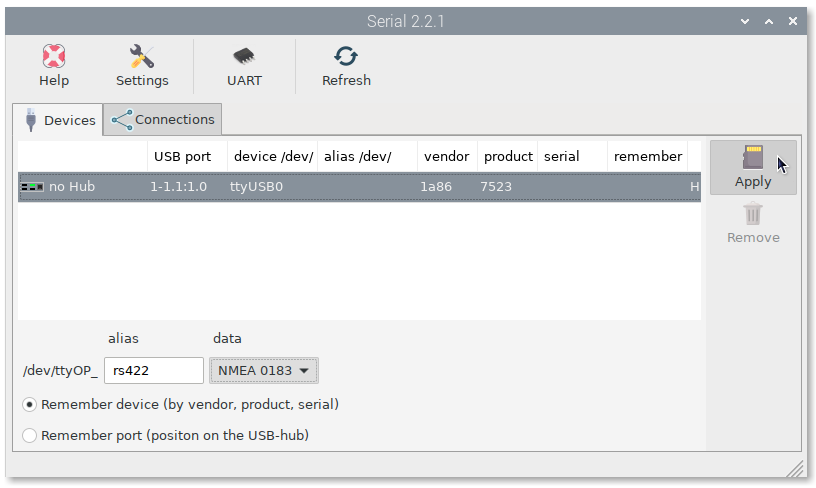
To obtain data from these converters, follow the same steps as for connecting the GPS in the examples of the previous sections of this chapter. Below are the summarized steps.
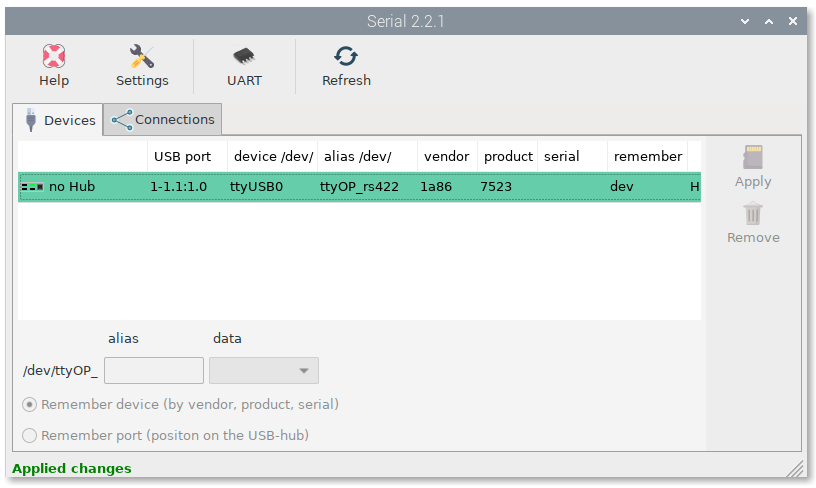
Enter an alias and select the type of data:
Create a signal K connection:
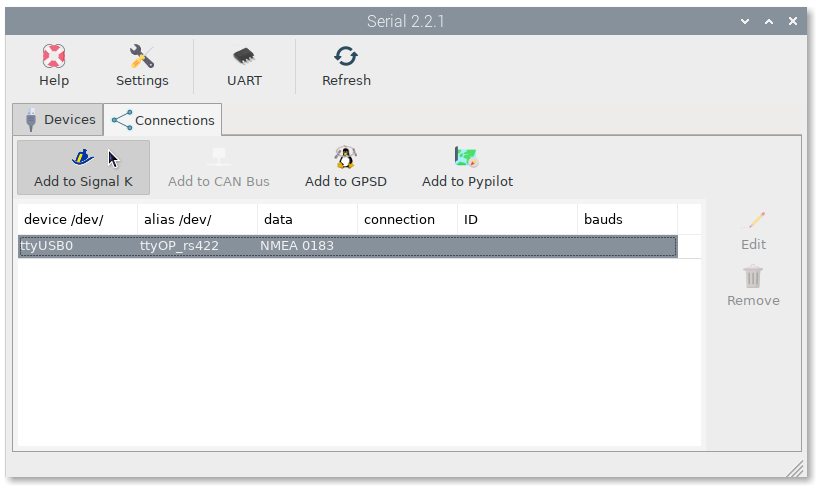
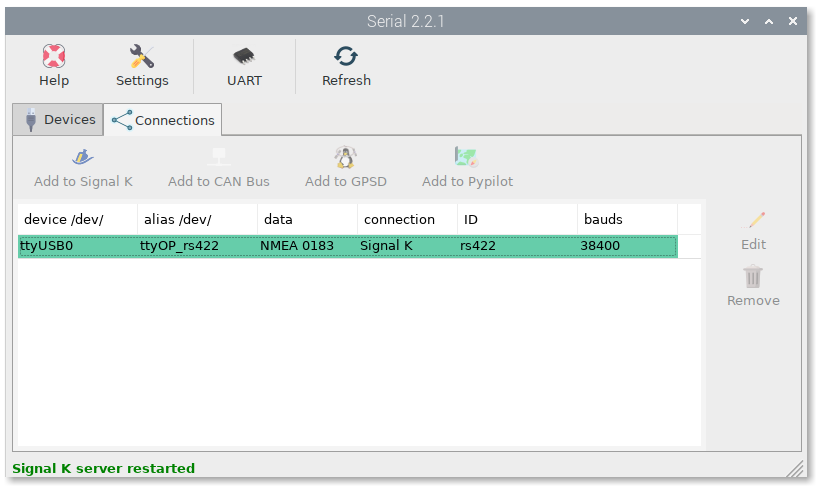
Check the Signal K connection has been made:

And check OpenCPN to make sure there is a connection to the Signal K server:
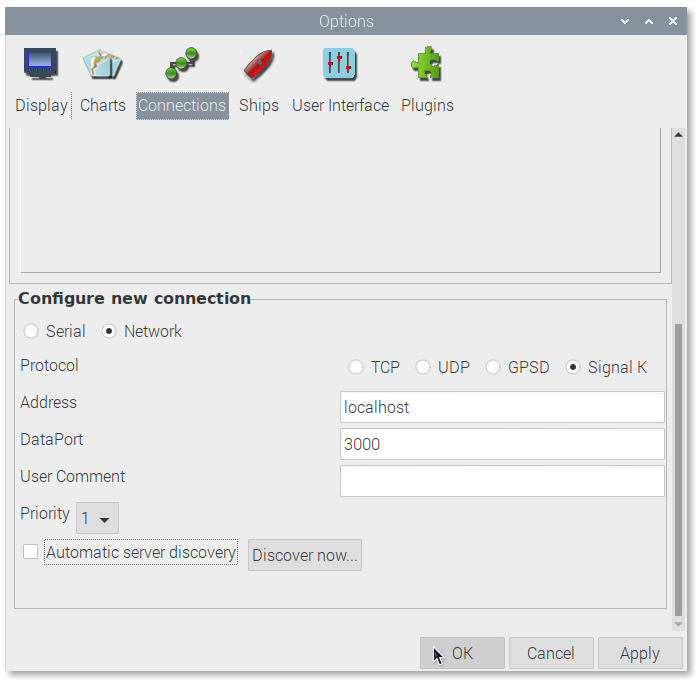
You should now be ready to get NMEA 0183 data from your boat.
Input + output data
Now that you are getting NMEA 0183 data from your boat, you may also want to send some NMEA 0183 data generated in OpenPlotter to your boat. The classic case is to let openplotter control your autopilot. Let’s see how to configure your route in OpenCPN and send data to the autopilot using the same USB-RS422 converter.
You have to create a UDP connection in OpenCPN to send data to Signal K server. Select Network, Protocol: UDP, Address: 0.0.0.0, DataPort: 10119 (or any unused UDP port on your system), User Comment: opencpnOUT, uncheck Receive input on this Port, check Output on this port, transmit only sentences RMB and APB in Output filtering:


Warning
Allowing only RMB and APB sentences in the output is important to avoid data loops in your system.
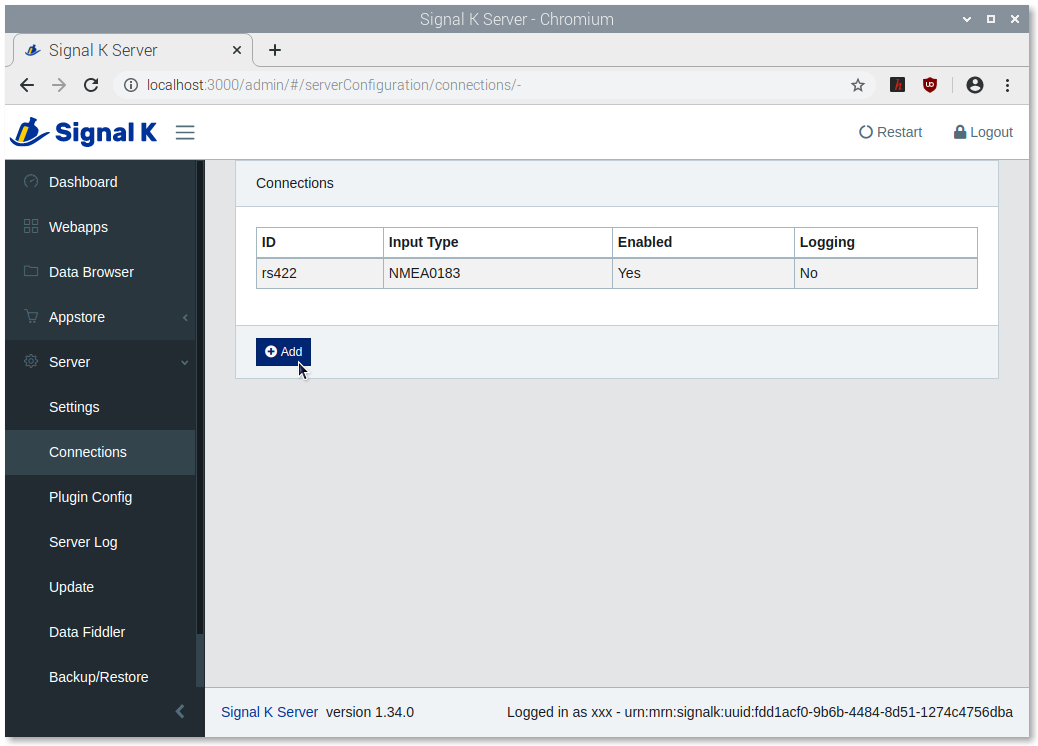
Now you have to create a connection in Signal K server to get data from OpenCPN. Login to the Signal K server, go to and click on Add:
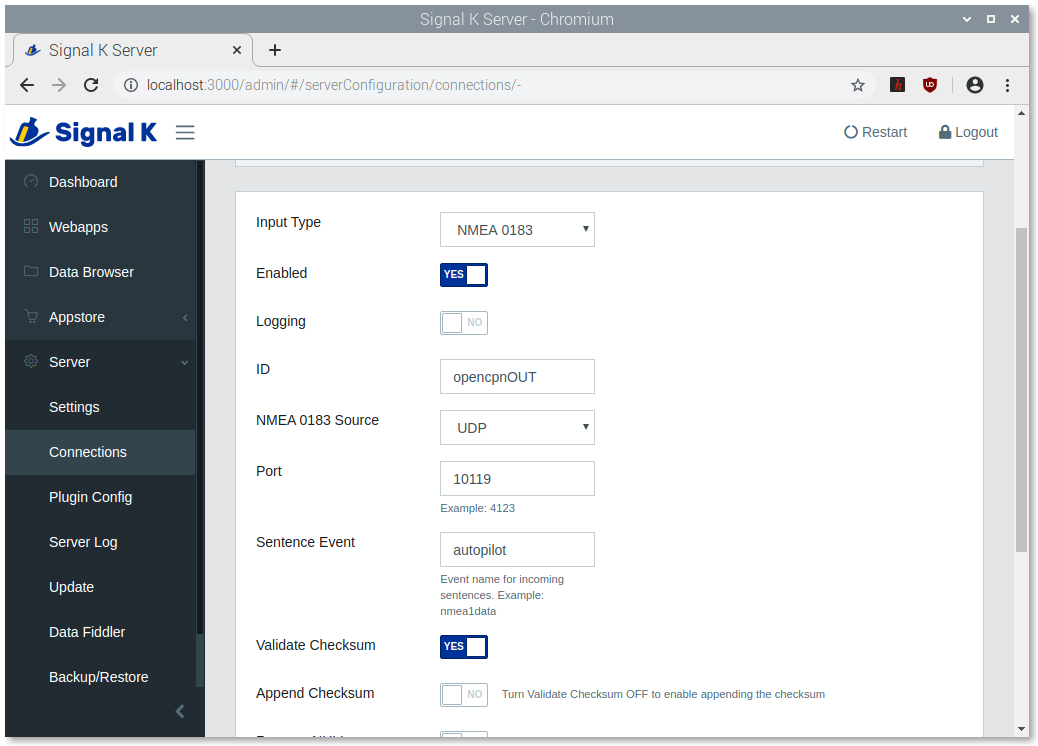
Set Input Type: NMEA 0183, ID: opencpnOUT, NMEA 0183 Source: UDP, Port: 10119 (or whatever you have set in OpenCPN), Sentence Event: autopilot and Click Apply:
Finally, you have to edit your device connection to specify what data should be sent to your boat via the USB-RS422 converter. Go to and click on your device connection, in this case rs422:

Set Output Events: autopilot and Click Apply:

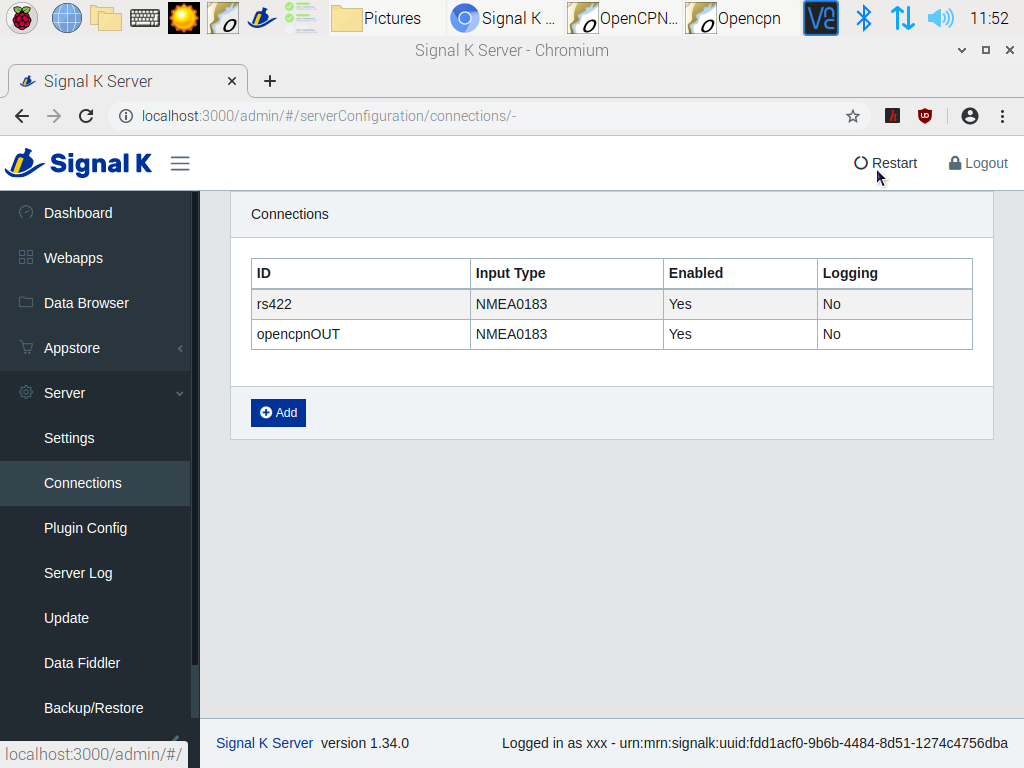
Restart Signal K server and you are done:
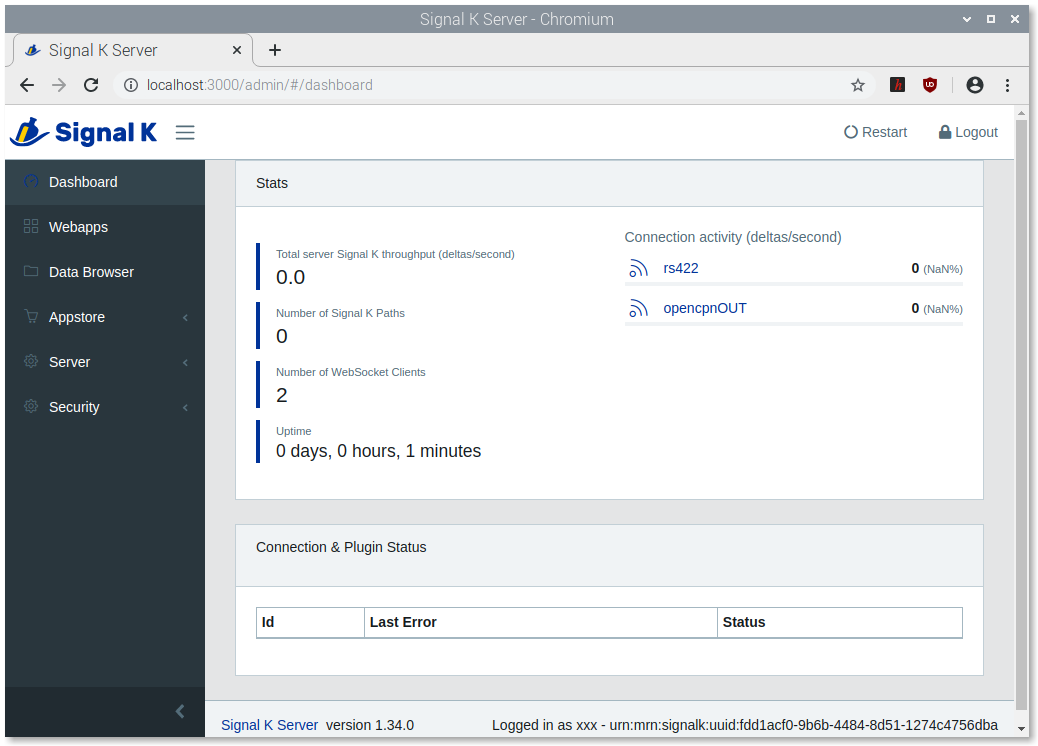
Activate a route in OpenCPN and you will start sending data to your autopilot.
Connecting a USB-CAN converter
This tutorial is for the Actisense NGT-1, the OpenMarine CAN-USB Stick (discontinued) and the CANable devices.
Input data
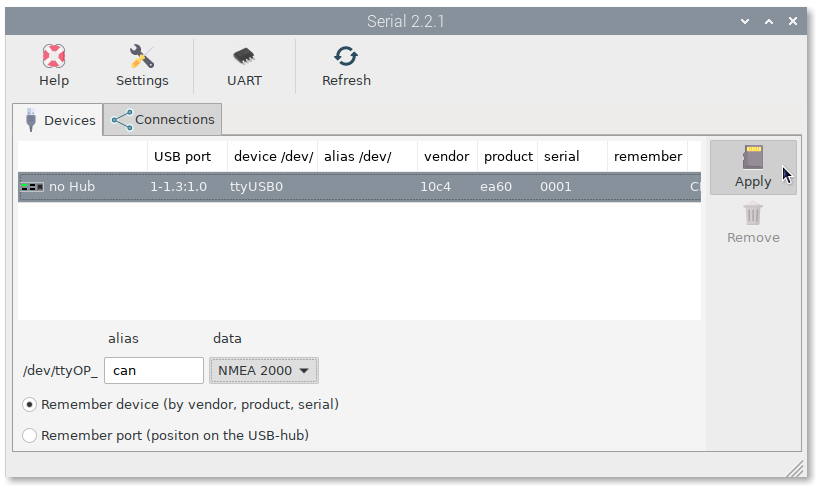
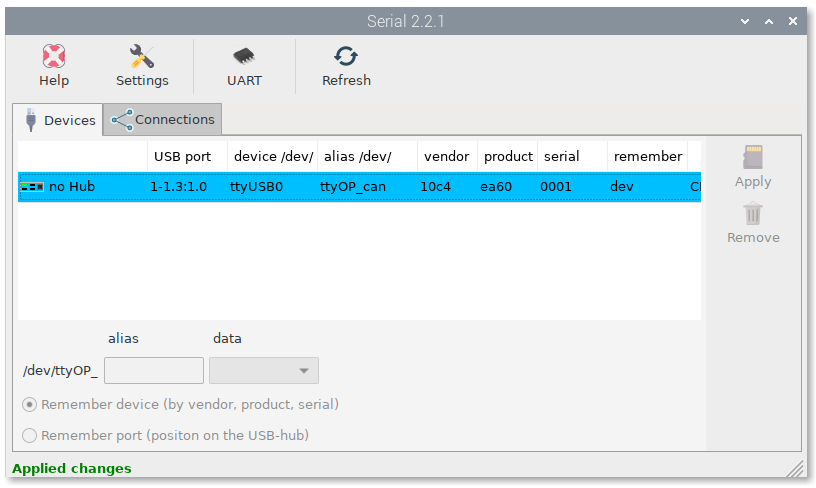
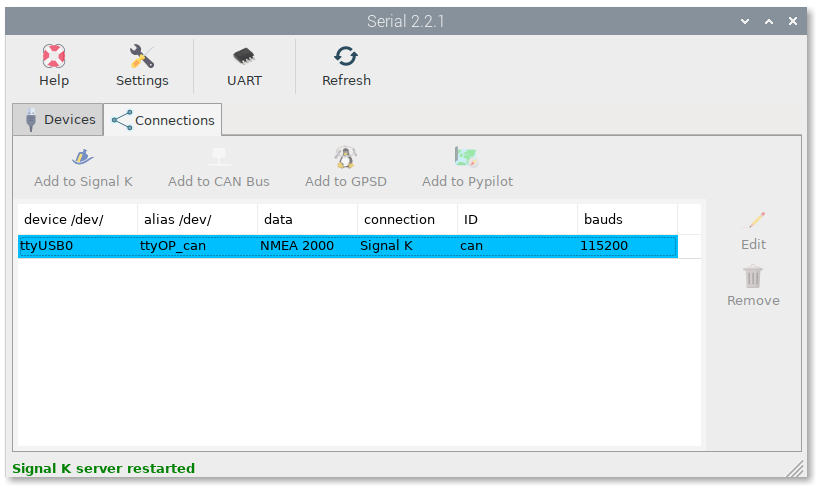
To get data from your NMEA 2000 network you have to select the device, enter an alias and select NMEA 2000 in data field. Finally press Apply and the device will be marked blue:
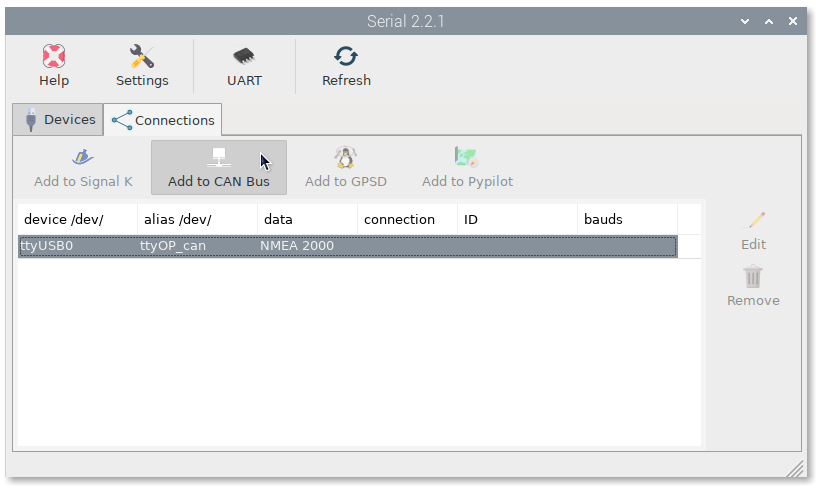
Then go to Connections tab, select the device and click on Add to CAN Bus:
If you are using a CANable device click on MANUAL and go to CAN Bus chapter to learn how to configure this device.
If you are using an Actisense NGT-1 or an OpenMarine CAN-USB Stick (discontinued) device, select the Baud Rate (usually 115200) and click on AUTO.
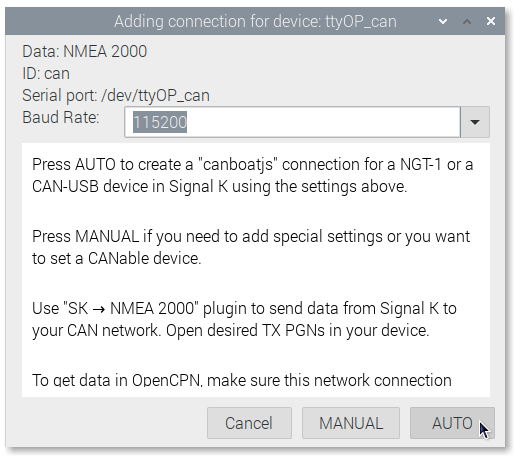
The device will be marked blue and you are done:
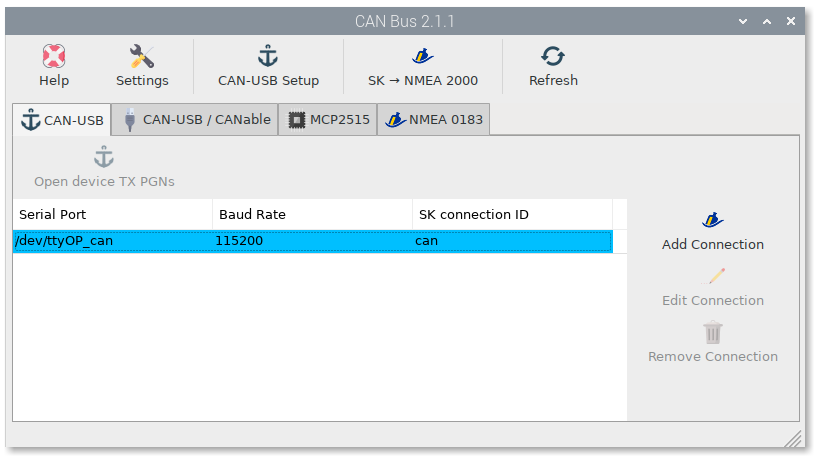
Open the CAN Bus app to confirm that the device has been added to the CAN-USB tab:
And go to Signal K server to confirm that the connection has been made:
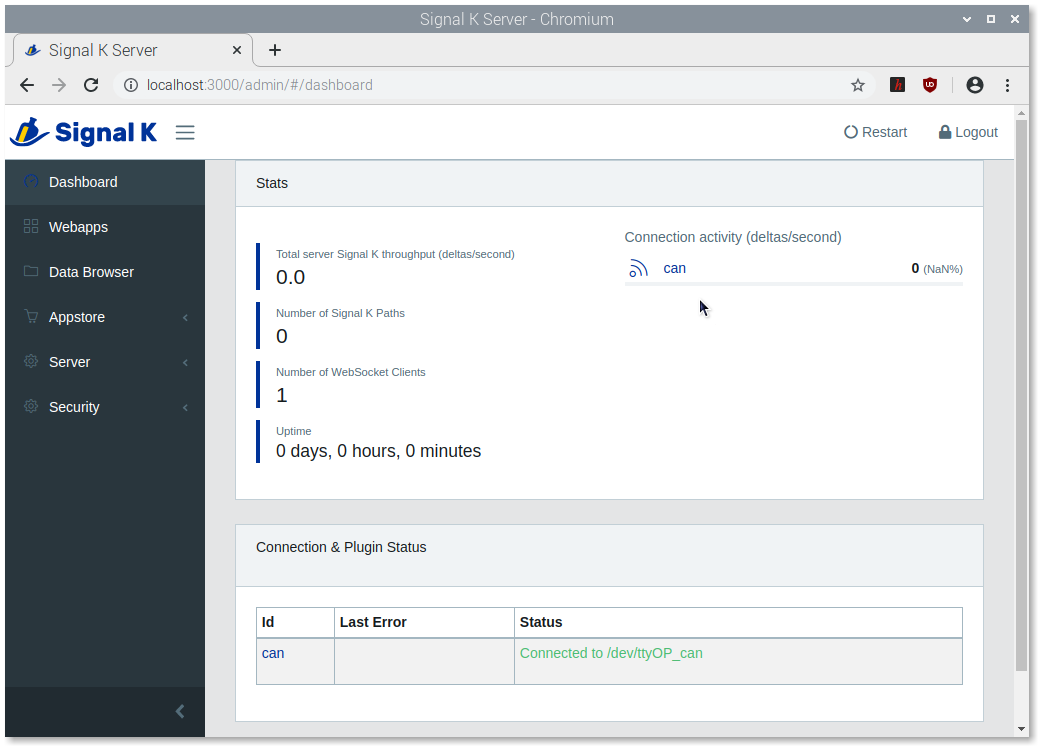
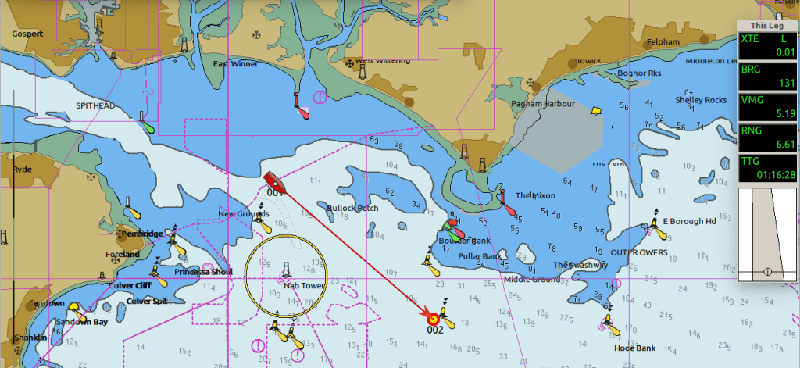
Check OpenCPN to make sure there is a connection to the Signal K server and you are getting data from your NMEA 2000 network:
Input + output data
If you have any sensor in OpenPlotter sending data to the Signal K server, you can use the same USB-CAN converter to send this data to your NMEA 2000 network.
To protect your network, the Actisense NGT-1 and the OpenMarine CAN-USB Stick (discontinued) devices have most PGNs blocked for transmission. On CANable devices, PGNs transmission is not blocked.
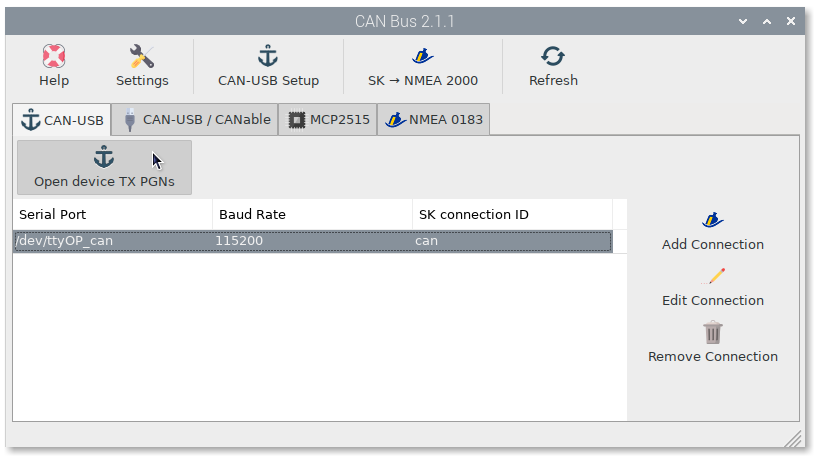
To unblock the PGNs you want to send to your NMEA 2000 network, go to CAN Bus app, select the device and click on Open device TX PGNs:
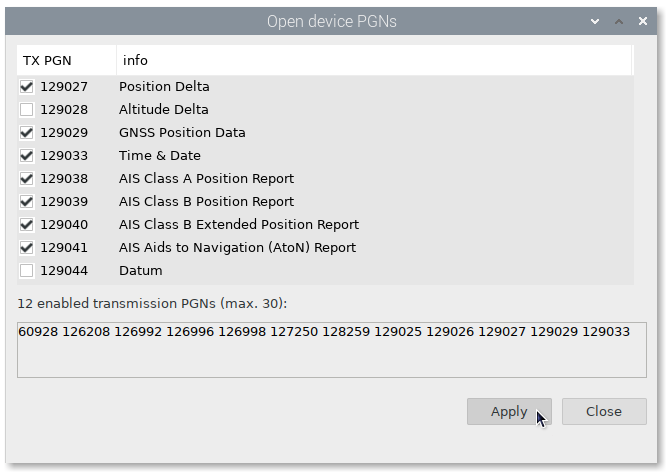
Enable the PGNs you want to unblock and click Apply:
Note
If you see this message: The list of enabled PGNs is empty, you may need to try a different baudrate or reset your device to 115200 bauds, click on CAN-USB Setup to fix your device baud rate.
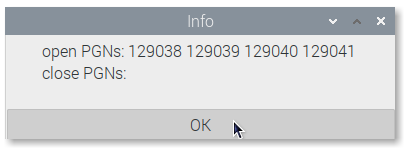
Click OK to write changes to the device:
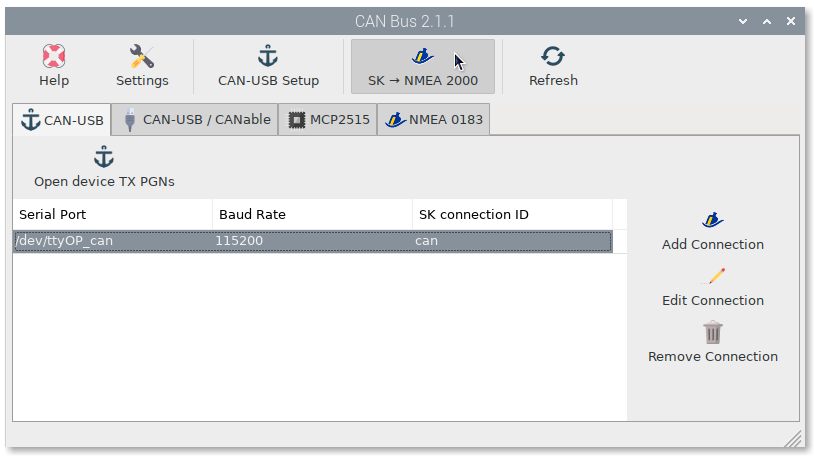
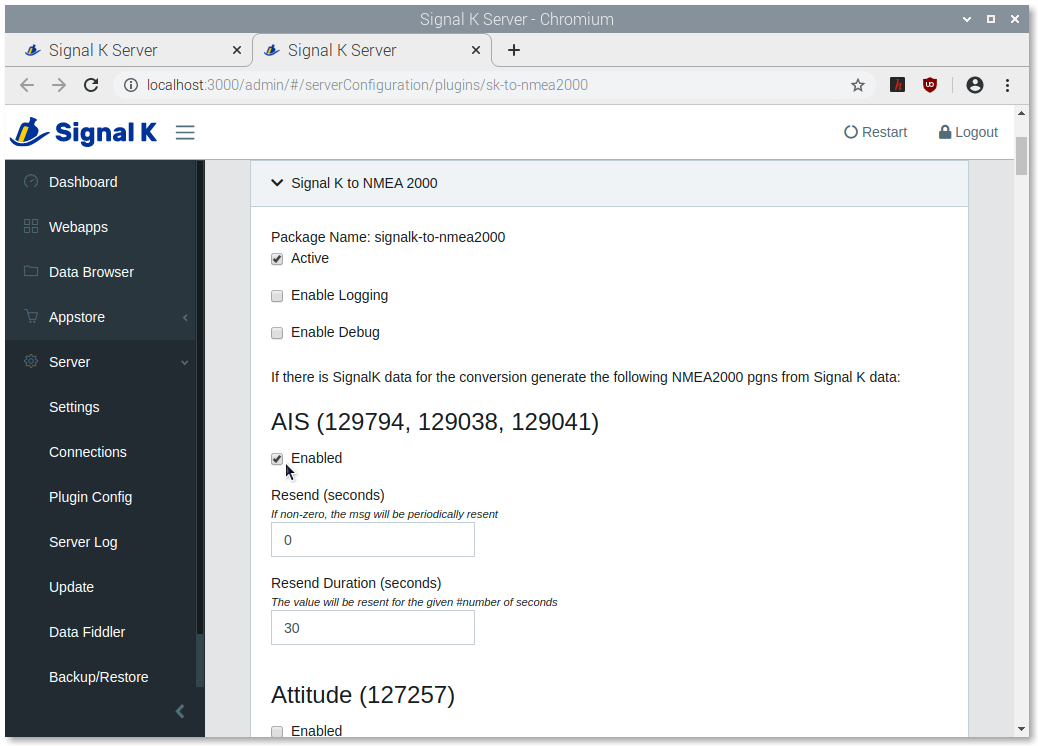
Finally, you have to tell the Signal K server what PGNs you need to convert from Signal K format to NMEA 2000 format (for any device model). To do this we use the plugin Signal K to NMEA 2000. Click on SK → NMEA 2000 and you will be directed to the configuration page of this plugin:
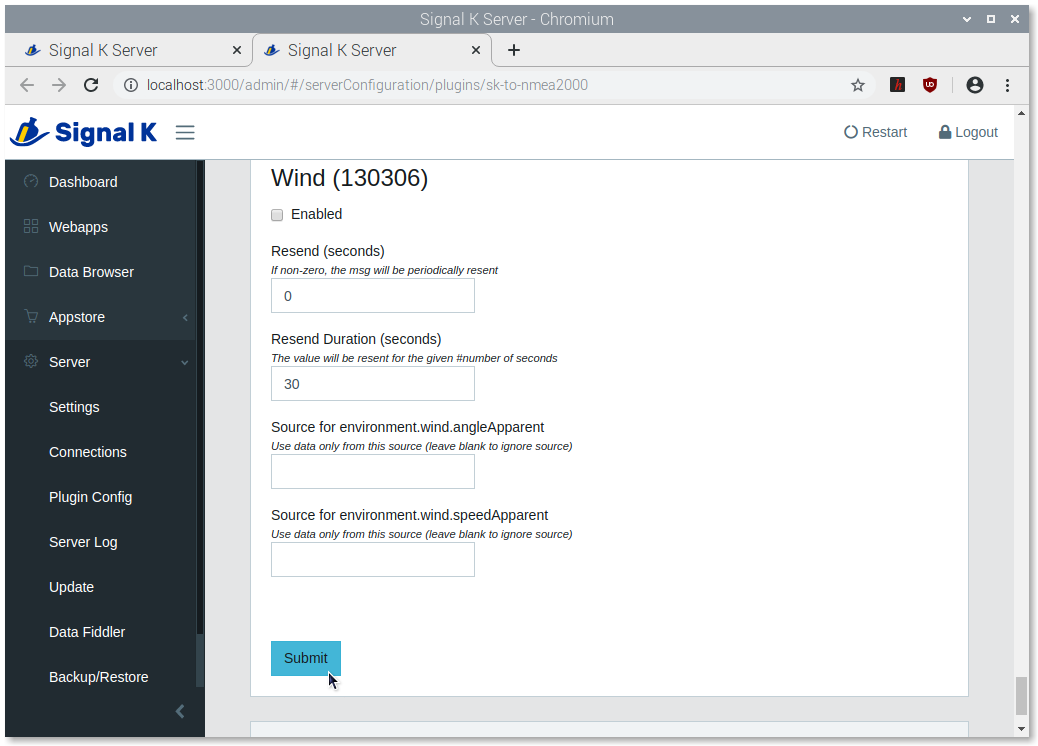
Enable Active and the desired PGNs:
Click on Submit at the bottom of the page and you are done:
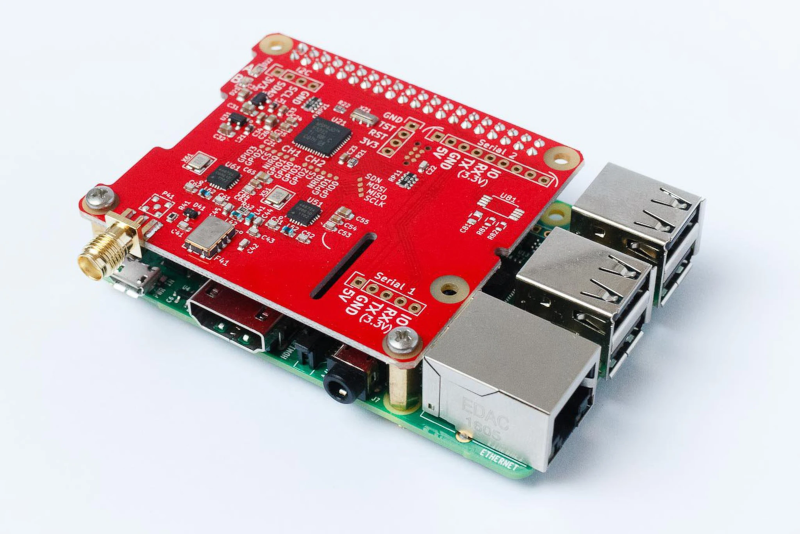
Connecting the dAISy HAT
Specification
- True two channel receiver, continuously receiving on AIS channels A (161.975 MHz) and B (162.025 MHz)
- Superior sensitivity compared to other low-cost AIS receivers
- Low power, less than 200mW in receive mode (<40mA at 5V)
- 38400 baud serial output in industry standard NMEA format (AIVDM)
- Communicates with Raspberry Pi via UART0 (serial0)
- Works with Raspberry Pi 1 (A+/B+ only), Pi 2, Pi 3 and 4 (see note below), and Pi Zero
- Shape and size compliant with Raspberry Pi HAT standard
- Breakout pads for 2 independent TTL serial outputs, 3.3 and 5 volt rails, and Raspberry Pi I2C port
- SMA antenna connector
- SMA-to-BNC adapter and hex standoffs included
Note
This product is available in the OpenMarine Shop. Buying at OpenMarine Shop helps us keep the project alive.
On the original product page you will find the full specification and a better choice for US buyers.
Configuration
Mount the dAISy HAT in your Raspberry Pi and enable the serial port on the GPIO header of the Raspberry Pi by clicking the UART icon:
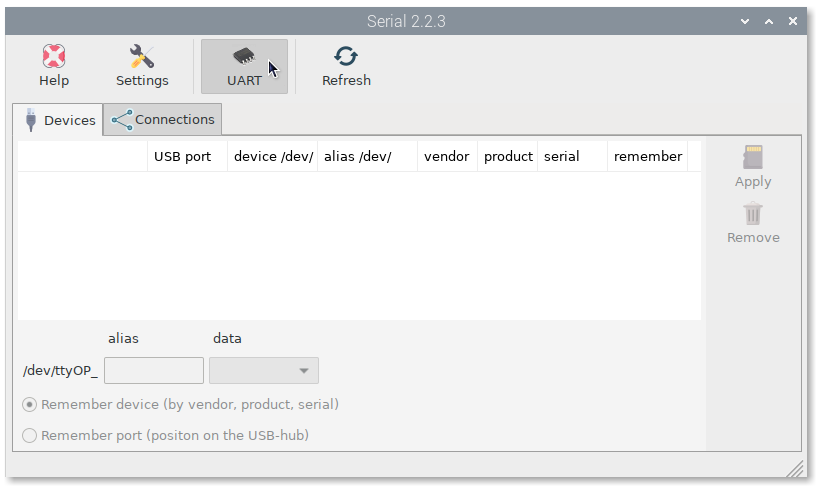
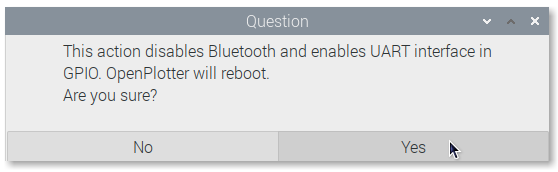
Acknowledge the warning, and reboot the Raspberry Pi:
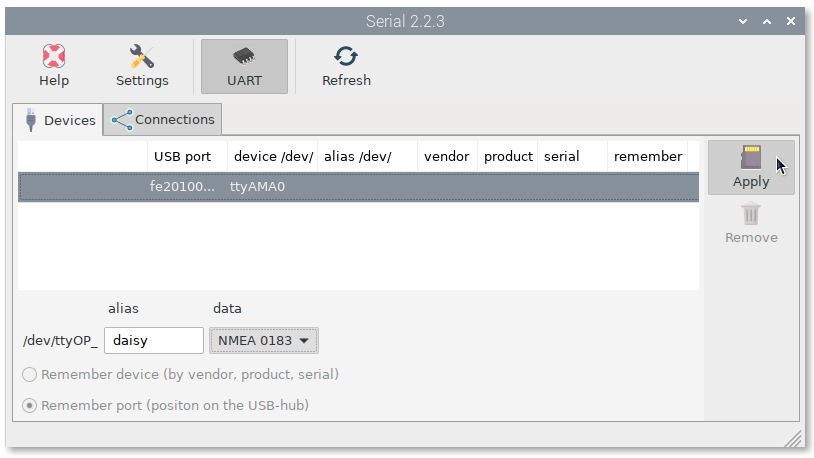
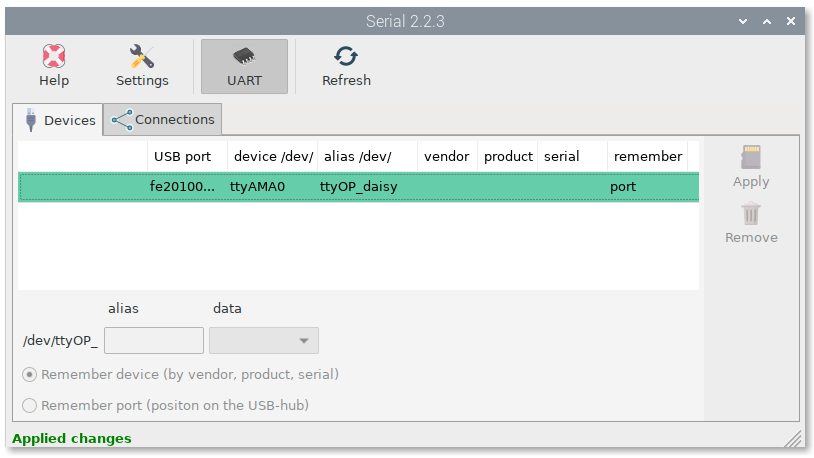
After the reboot, launch the OpenPlotter Serial app again. On the Devices tab, you should now see an
entry ttyAMA0. Select the line with ttyAMA0 and give it an alias (for example daisy) and select
NMEA 0183 from the data dropdown, then press Apply:
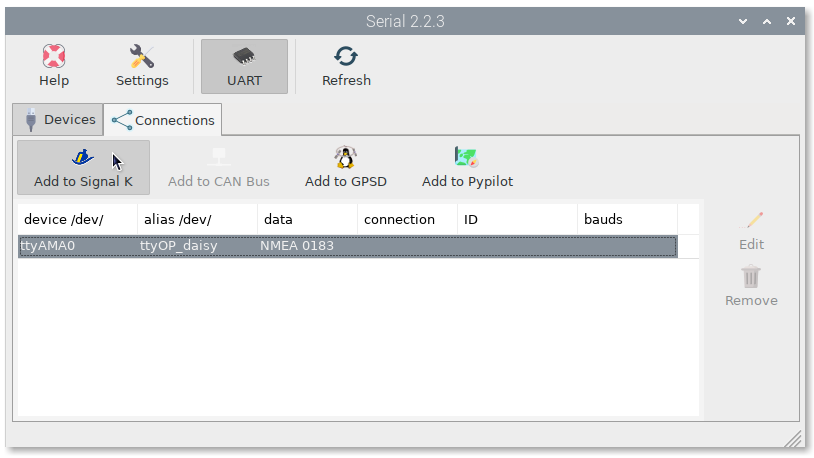
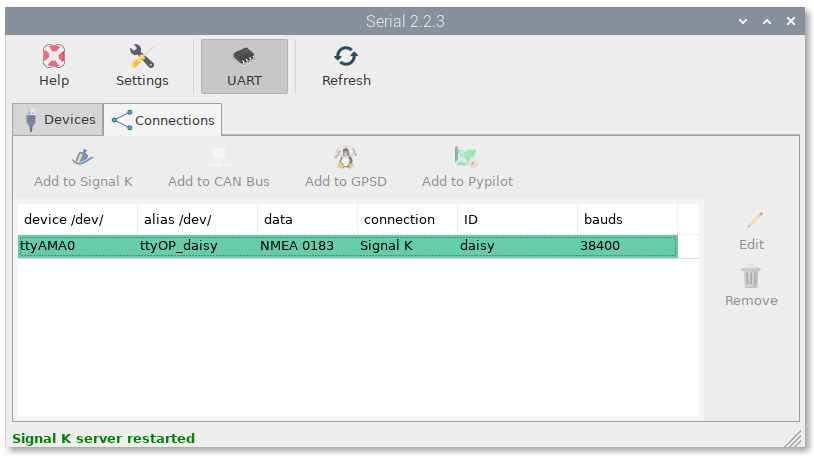
We now need to connect the ttyOP_daisy device with the Signal K server, the central data processing hub of OpenPlotter. Switch to the Connections tab, select the ttyOP_daisy device and click Add to Signal K:
From the Baud Rate dropdown menu select 38400, then press AUTO:

The Signal K server and applications connected to it, like OpenCPN, should now receive AIS data:
Check OpenCPN to make sure there is a connection to the Signal K server and you are getting data from your dAISy HAT: