Configuration
The easiest way to make Moitessier HAT work on Raspberry Pi is to download and install a special OpenPlotter edition. Everything is preinstalled and preconfigured in OpenPlotter Moitessier HAT edition and it will work out of the box, just plug and sail!
It is recommended to read the rest of the chapter to learn how to configure the HAT on your own and be able to play with its settings.
Important
If you are using the OpenPlotter Moitessier HAT edition, the only thing you should do is calibrate the compass following the steps of the Pypilot compass calibration chapter.
You should reinstall the driver at least once even if everything works fine to make sure that your HAT firmware is up to date, especially Moitessier HAT 1 users.
If you are not using the OpenPlotter Moitessier HAT edition, you have to be sure the list of apps below are installed. These apps have to be installed from OpenPlotter Settings interface.
OpenCPN InstallerSignal K InstallerSerialPypilotMoitessier HATI2C
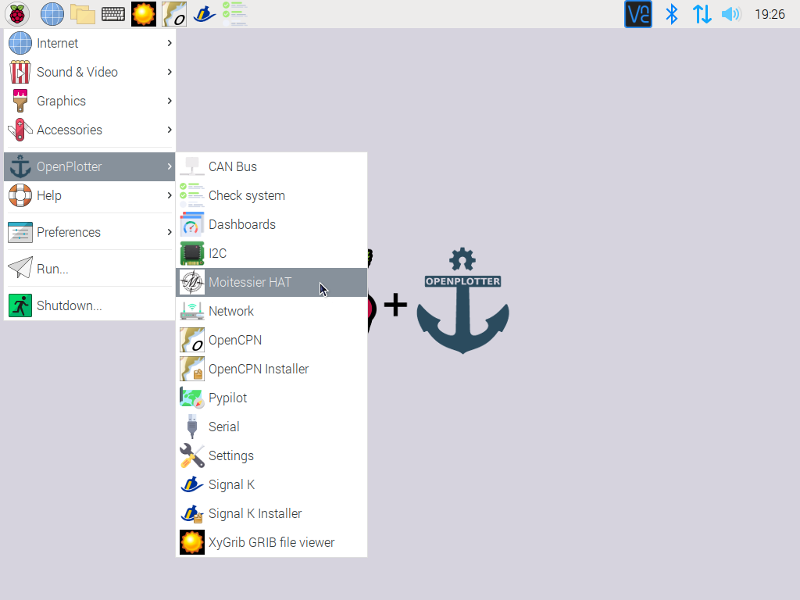
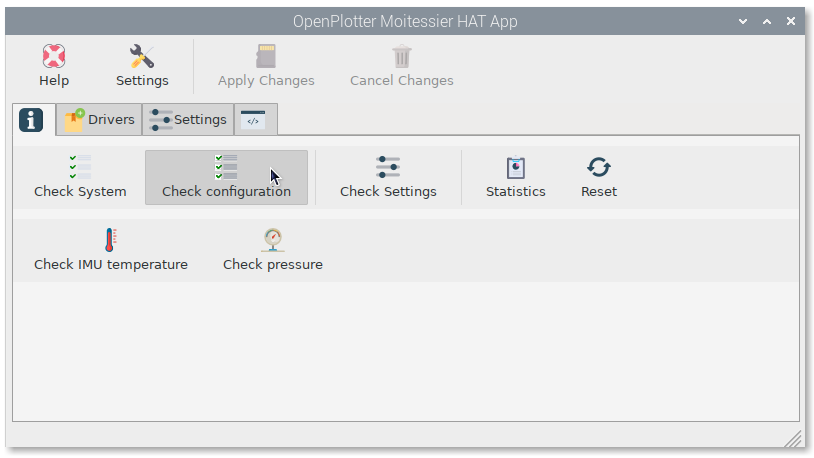
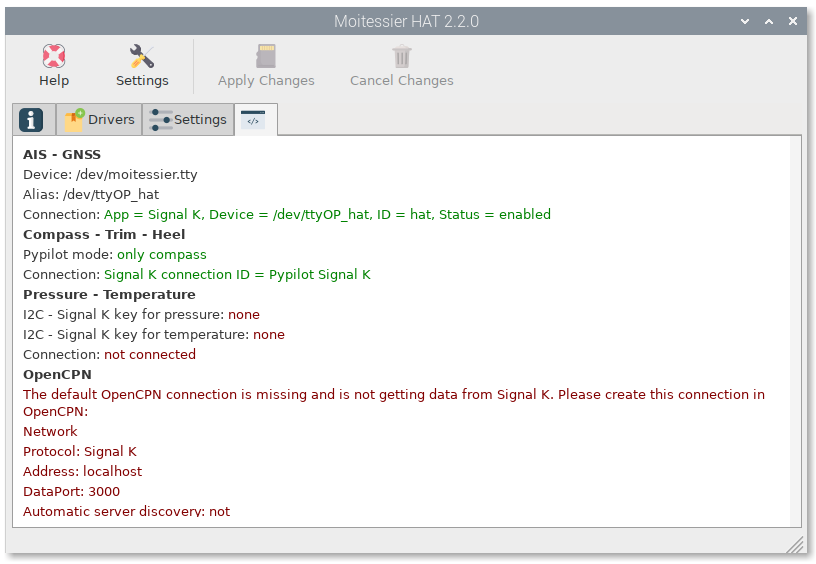
After installing these apps go to Moitessier HAT app and click on Check System:
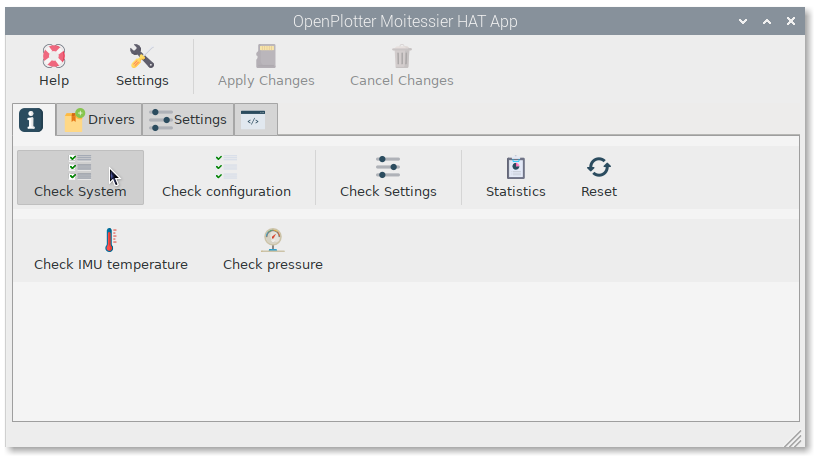
You could see some error messages because SPI and I2C interfaces are disabled or the Moitessier HAT driver is not installed yet:
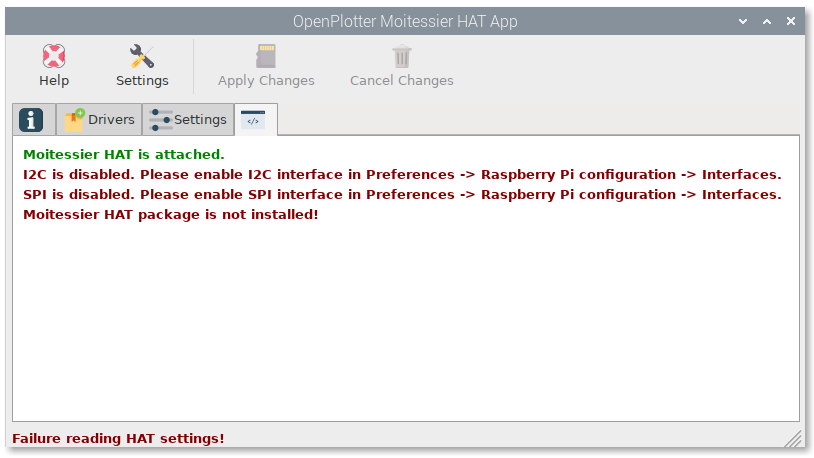
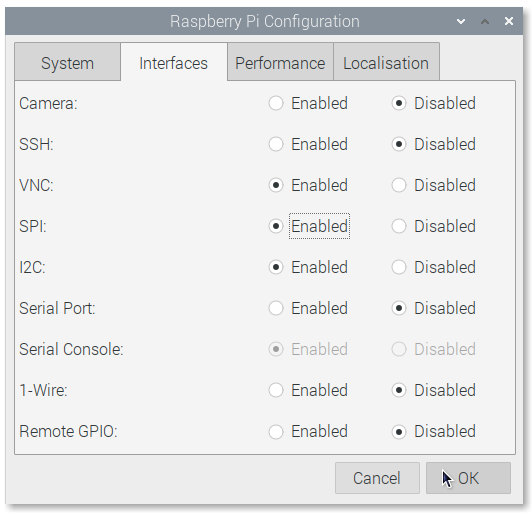
SPI and I2C must be enabled before installing the drivers. Go to applications menu and enable both of them in :
Installing drivers
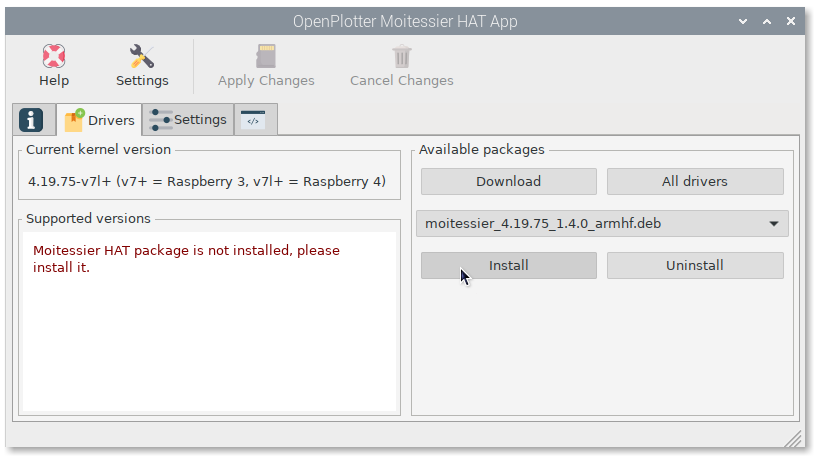
The driver must match your kernel version. After updating your system, the kernel could be also updated and your HAT will stop working. In Drivers tab you will find your current kernel version. Select the package matching your kernel and click on Install. The drivers will be installed and the system rebooted. The package may need to do this twice, you will be notified.
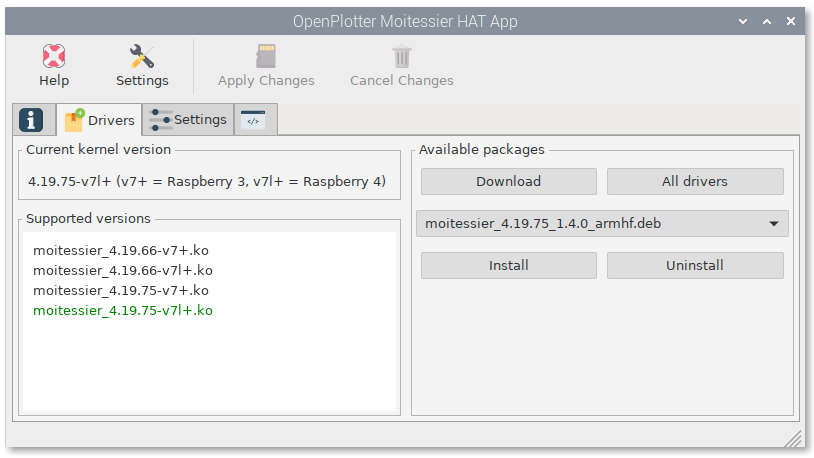
After rebooting you should see a list of kernels supported by the installed driver. If your current kernel is not supported by any of the available packages, click on Download and the system will try to find a suitable package from Internet. If this fails too, click on All drivers to go to Rooco site and ask them when the package will be available.
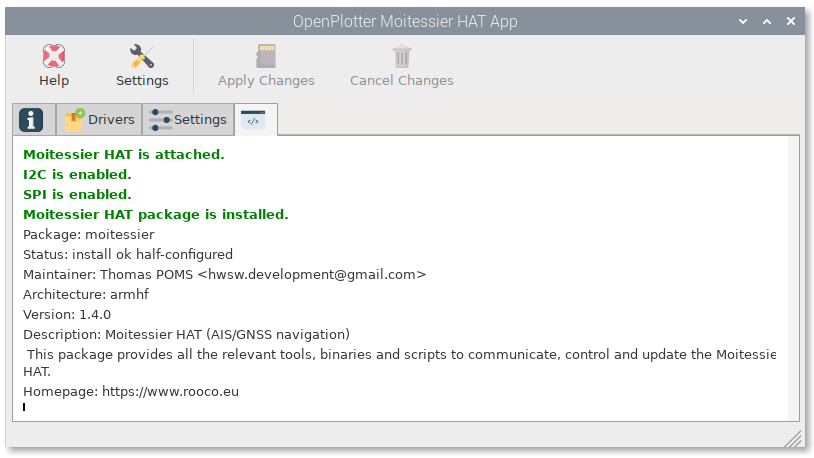
If everything went well, you should see something like this by clicking on Check System again:
Now you are ready to configure your system. Go to Info tab and click on Check configuration. The goal is to send all data to the Signal K server to be shared with any program that need data from our HAT like OpenCPN. The rest of apps will help us to do this.
Configuring AIS and GNSS reception
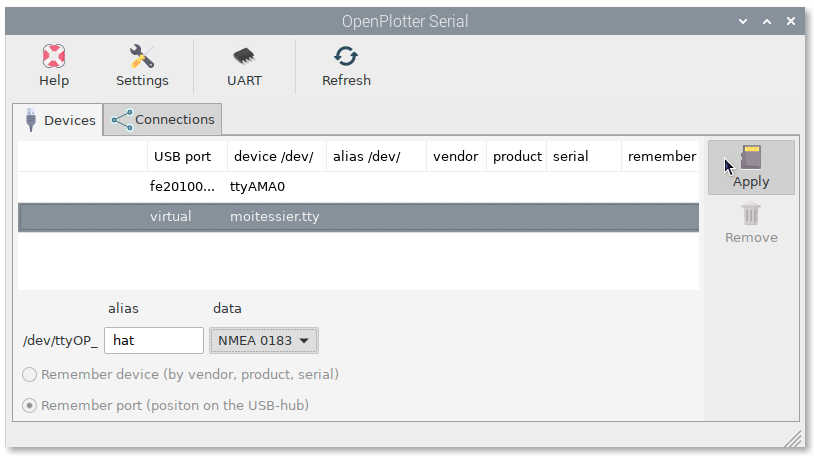
Go to Serial app and select the HAT from the the list of detected devices in Devices tab. Provide a short alias and select NMEA 0183 as the format of the expected data. Finally click Apply:
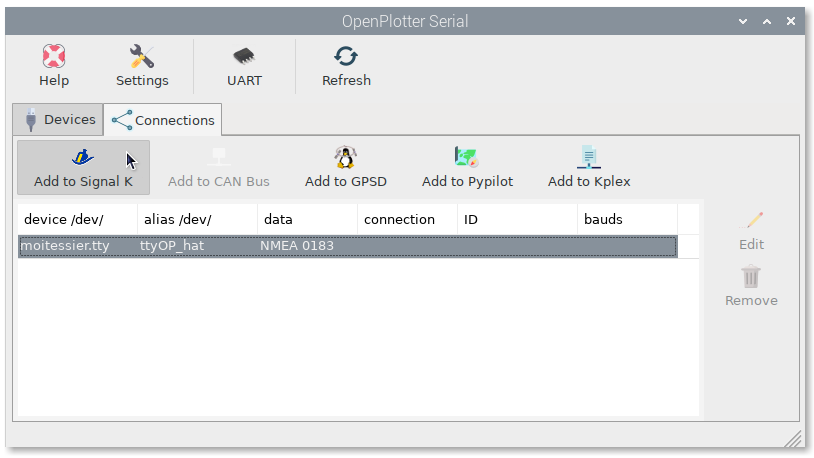
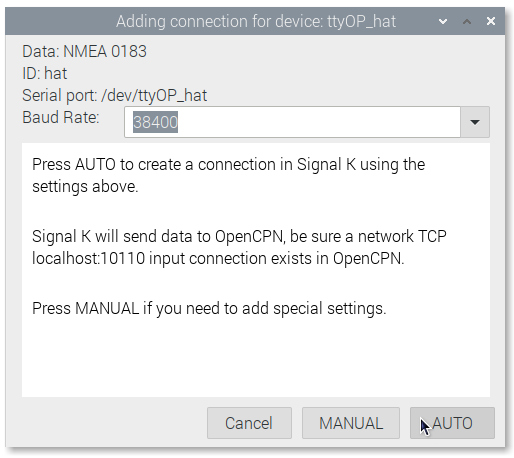
Go to Connections tab, select the HAT from the list, click on Add to Signal K and in the next window click AUTO. This way we are creating a serial connection in Signal K server using the settings provided by Serial app.
Note
If you are going to use an autopilot you should select Add to Pypilot and finally connect pypilot to Signal K. See pypilot chapter for details.
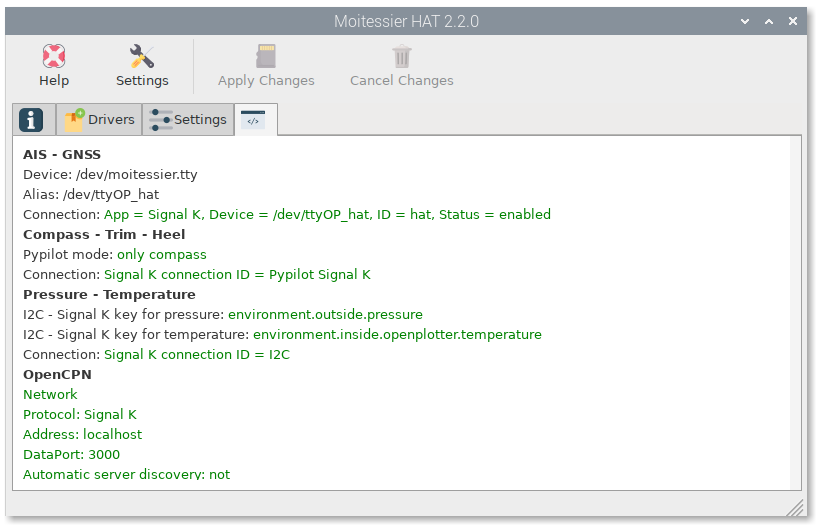
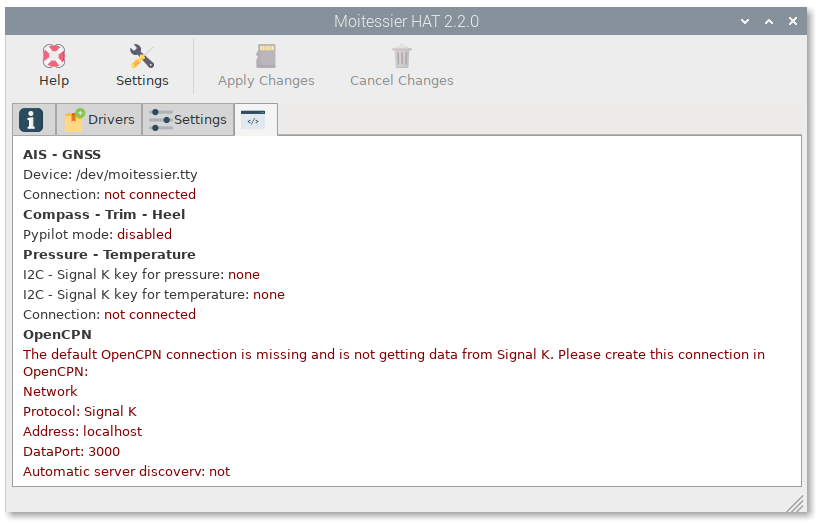
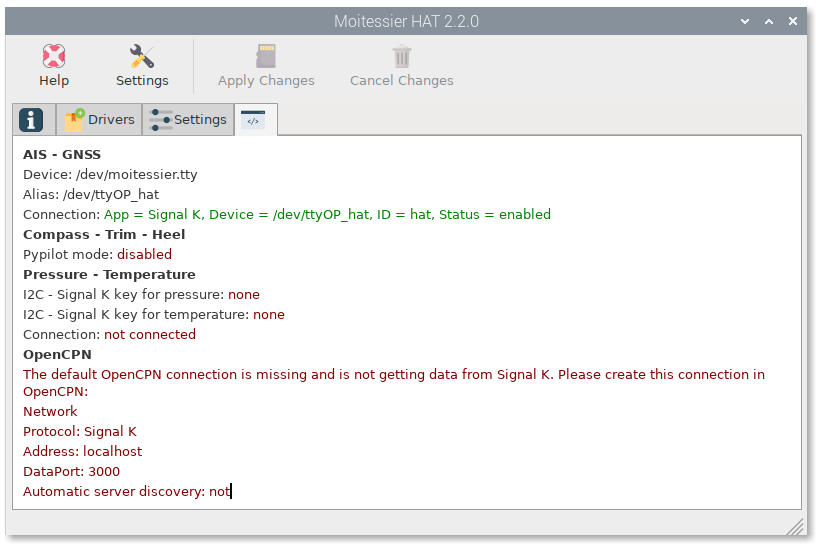
Go to Info tab and click on Check configuration again to see the changes:
Configuring compass, heel and trim reception
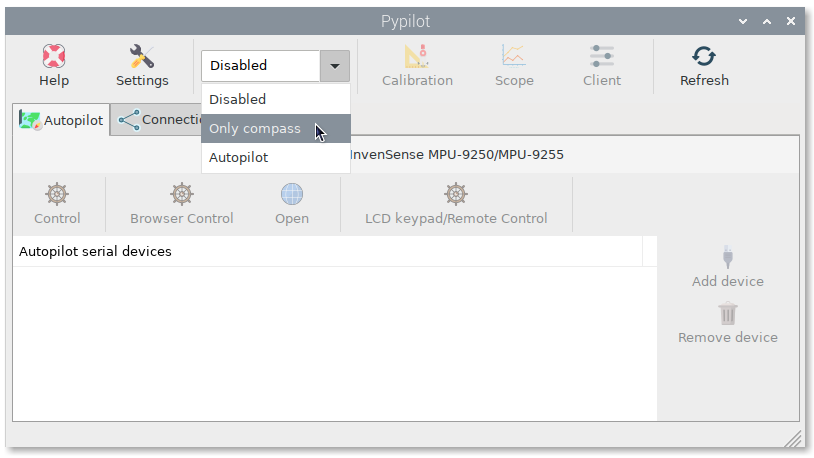
Go to Pypilot app an select Only compass.
Note
If you are going to use an autopilot you should select Autopilot. See pypilot chapter for details.
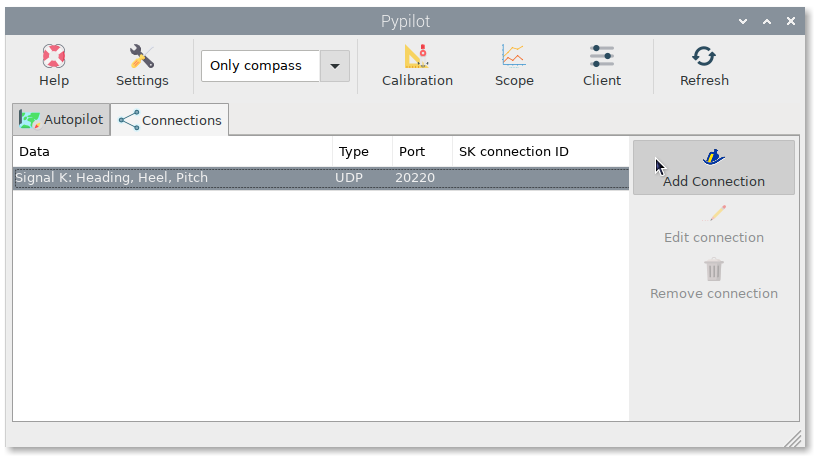
Then go to connections, select the available connection and click on Add connection. This way we are creating a network connection in Signal K to receive heading, pitch and heel data.
Important
To get reliable heading readings you have to calibrate the compass following the steps of the Pypilot compass calibration chapter.
Go to Info tab and click on Check configuration again to see the changes:
Configuring pressure reception
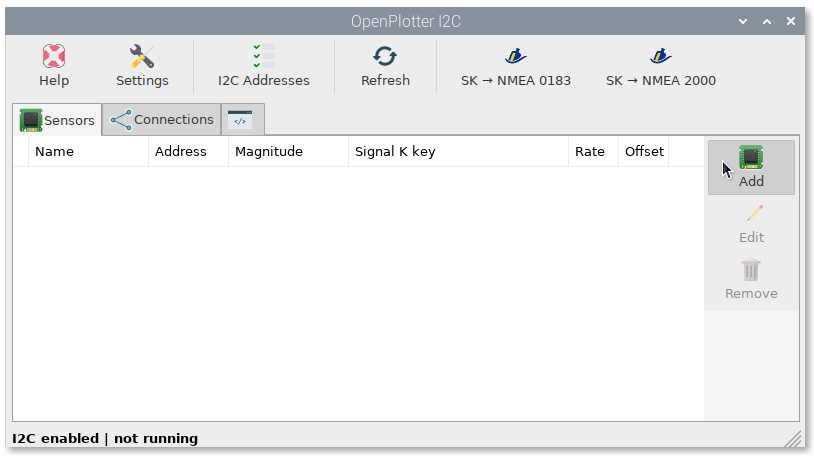
Go to Sensors tab in I2C app an click Add.
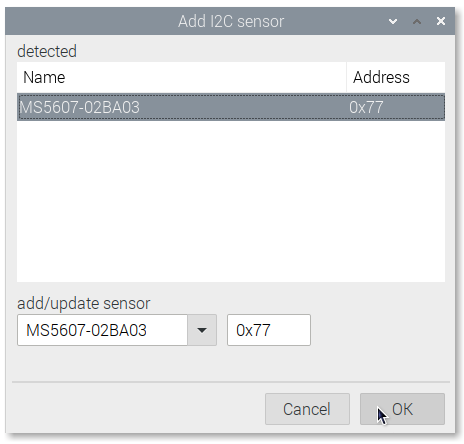
Select MS5607-02BA03 in the list of detected sensors and click OK.
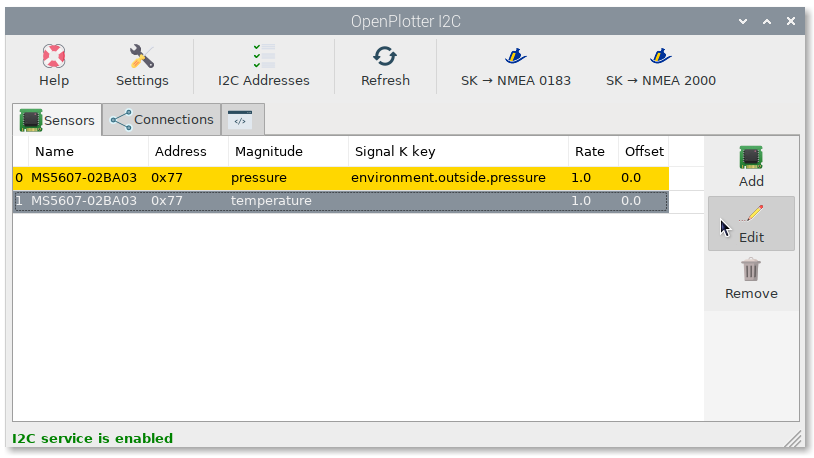
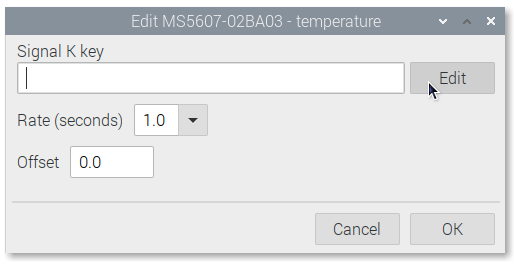
A Signal K key will be created for pressure by default. You can assign another one for temperature. The temperature sensor is affected by the heat produced by the Raspberry and the HAT itself, so we can not assign this value to environment.inside.temperature key, we should use something like environment.openplotter.temperature. Select temperature and click in Edit.
To choose a Signal K key click Edit.
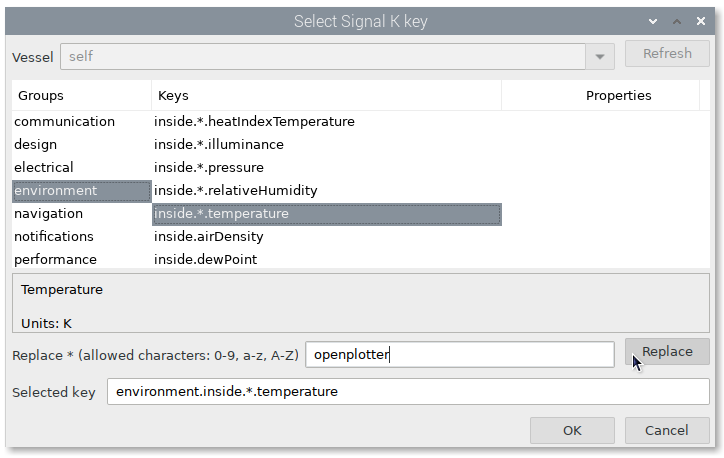
Select environment in the first column and inside.*.temperature in the second column. Write openplotter in the Replace field, press Replace button and the wildcard will be replaced by openplotter. Press OK.
We do not need pressure or temperature data every second so we will select another Rate. Click OK. Edit the pressure value to select another Rate too.

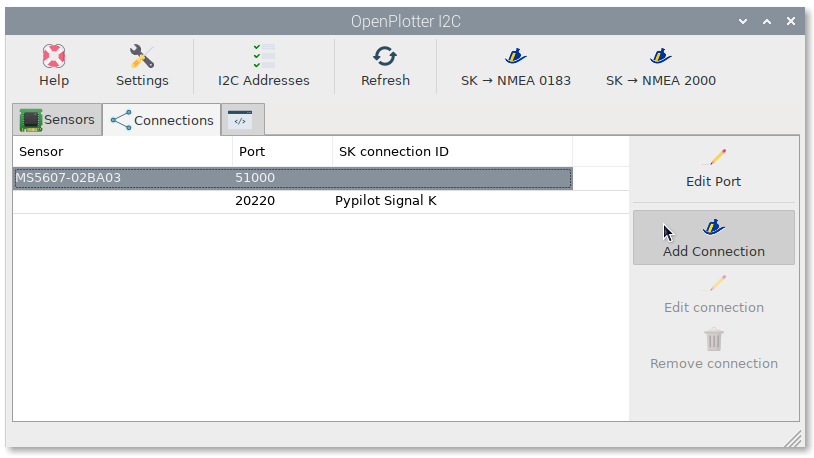
Go to Connections tab, select MS5607-02BA03 sensor and click in either Add Connection to create a new network connection in Signal K or Edit port if you want to send these data to any existing network connection in Signal K.
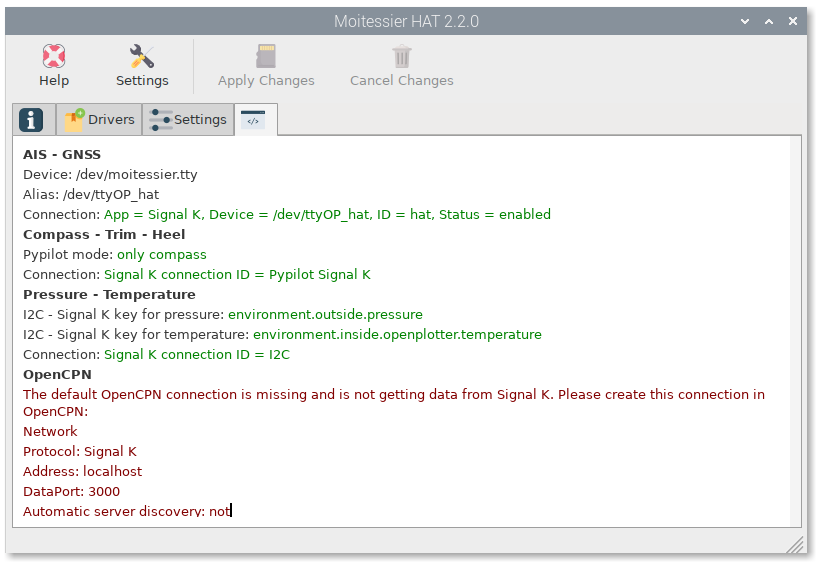
Go to Info tab and click on Check configuration again to see the changes:
Configuring OpenCPN
As of version 5.2, OpenCPN can manage Signal K data, so we no longer need to convert Signal K data to NMEA 0183. You just need to create this connection in OpenCPN:
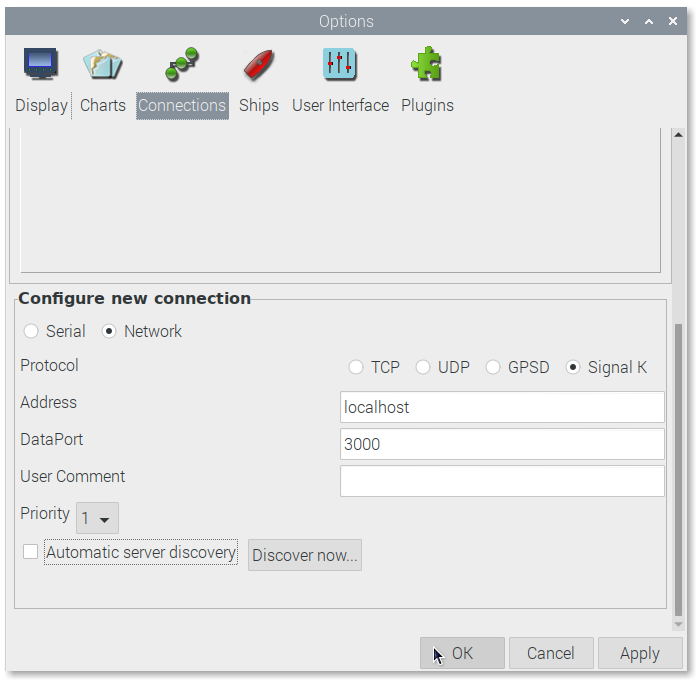
The default port of the Signal K server is 3000, but you can change it. If you are not sure which port you have configured, go to the Signal K Installer app to check.

Magnetic Heading (circle), Course Over Ground (square)
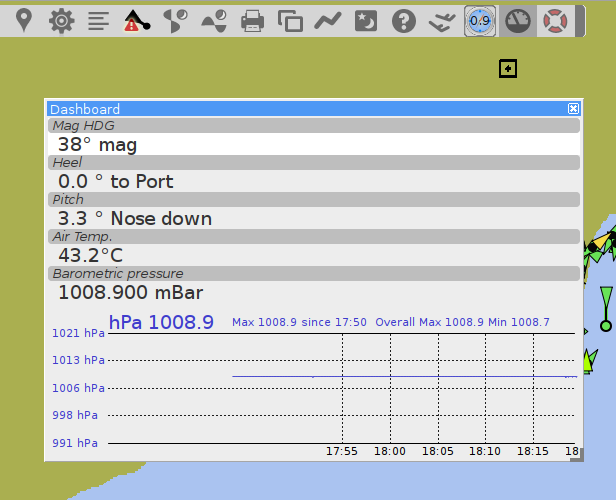
Heel, Pitch and Pressure
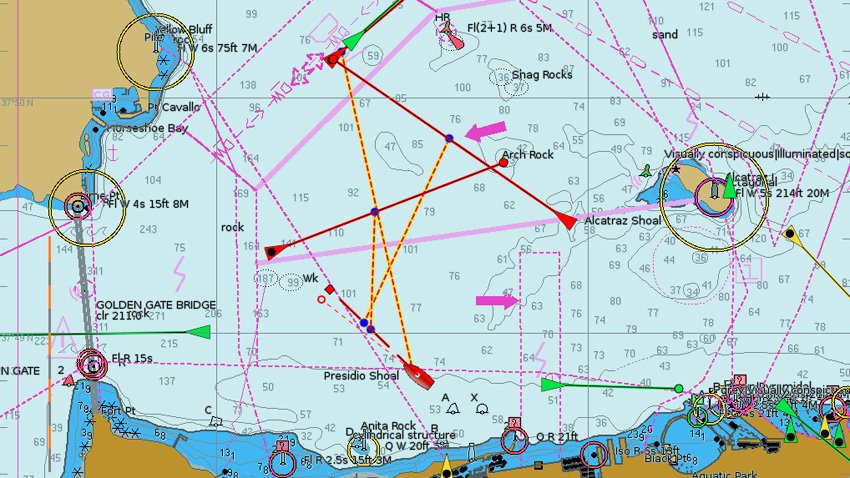
AIS
Go to Info tab and click on Check configuration again to see the changes: